【注意】最后更新于 April 11, 2018,文中内容可能已过时,请谨慎使用。
{% github it-boyer SmallDemo 5931b43 width = 30% %}
官网
small是android与iOS平台比较出名的轻巧的跨平台插件化框架,也正是被这一点吸引,决定将small应用到集团内部的应用引擎模块化方案中,本篇博文主要讲述本人基于small在iOS平台实现的定制化APP方案(运营自由配置、自由组合、自动打包)~
特性与功能
基于iOS组件化基础
iOS组件化基于Cocoa Touch Framework(以下简称CTF)通过NSBundle实现。
- CTF首次公开在WWDC2014,要求Xcode6 beta以上版本。
- CTF官方表示支持8.0以上系统,但在6.0、7.0上测试正常。
- 如果你的App包含了CTF,但是Deployment Target < 8.0,上传二进制文件到App Store时会报警中断。
受苹果官方限制,如果你的CTF没有签名,将无法实现代码级别更新。
Framework 模式无法上传到App Store。只能应用到企业版
使用Small模版新建l项目
Small提供了Small-pods模版,安装Xcode模版创建空白的Small项目。
- 安装Xcode模板
1
2
3
| git clone https://github.com/wequick/Small.git
cd Small/iOS
cp -r Templates ~/Library/Developer/Xcode/Templates
|
- 新建项目
File->New->Project...,选择Small-pods模板

1
2
3
4
5
6
| platform :ios, '7.0'
use_frameworks!
target 'SmallAPP' do
pod "Small", :git => 'https://github.com/wequick/Small.git'
end
|
1
2
3
4
5
6
7
8
9
| {
"version": "1.0.0",
"bundles": [
{
"uri": "main",
"pkg": "hsg.com.cn.SmallAPP.app.main"
}
]
}
|
- 安装pod依赖
1
2
3
| cd [your-project-path]
pod install --no-repo-update
open *.xcworkspace
|
解读插件路由配置
插件路由:为了方便插件之间的跨平台调用,Small 提供了 bundle.json 来完成插件路由。
bundle.json路由配置包括version:指定插件的版本号,bundles:插件注册的清单数组,其中插件清单的每个插件四个属性,来确定加载组件的方式:
uri:指定加载插件的跟路径
1
2
3
4
| //获取控制器
let VC = Small.controller(forUri: "fixurl")
//将VC.view直接设置为window根视图
Small.openUri("fixurl", from: self)
|
pkg:配置要求新建的Framework命名时必须包含.lib.、.app.,因为在加载组件过程中用它来判断你插件的类型:
rules:规定页面的分发规则,可以通过rules来设置插件的多个入口,配和uri使用:openuri(uri/ruleskey),当不配置rules时,默认通过info.plist NSPrincipalClass来加载组件openuri(uri)。
路由配置文件bundle.json部分内容如下:
 1
 2
 3
 4
 5
 6
 7
 8
 9
10
11
12
13
14
15
16
17
18
| {
"version": "1.0.0",
"bundles": [
{
"uri": "lib.utils",
"pkg": "com.example.small.lib.utils",
"rules": { //会覆盖掉`Principal class`默认的启动页配置
"Storyboard": "storyboardName/controllerId",
"xib": "controllerName"
}
},
{
"uri": "main",
"pkg": "com.example.small.app.main"
}
]
....
}
|
small加载接口的相关方法
1
2
3
4
5
6
7
8
| + (void)openUri:(NSString *)uri fromView:(UIView *)view;
+ (void)openURL:(NSURL *)url fromView:(UIView *)view;
+ (void)openUri:(NSString *)uri fromController:(UIViewController *)controller;
+ (void)openURL:(NSURL *)url fromController:(UIViewController *)controller;
+ (UIViewController *)controllerForUri:(NSString *)uri;
+ (UIViewController *)controllerForURL:(NSURL *)url;
|
支持Storyboard作为启动页的解析
根据SMBundle路由配置信息,通过SMAppBundleLauncher的实例方法_controllerForBundle:加载Framework,支持storyboard加载。
- 路由
rules字典
1
2
3
| "rules":{
"":"Main/MainViewController"
}
|
空字串("")的value值两种格式类型:
`"$controllerName"`: `SMAppBundleLauncher`通过反射,初始化controller
`"storyboardName/controllerId"`:`SMAppBundleLauncher`会识别找到storyboard在更具id初始化controller
最终可以SMBundle实例变量target中得到该key("")的value值来定位插件包,在该过程通过对SMBundle的属性bundle.queryParams的处理,完成对插件对象的值传递
 1
 2
 3
 4
 5
 6
 7
 8
 9
10
11
12
13
14
15
16
17
18
19
20
21
22
23
24
25
26
27
28
29
30
31
32
33
34
35
| if ([bundle.target isEqualToString:@""]) {
targetClazz = bundle.principalClass;
} else {
NSString *target = bundle.target;
NSInteger index = [target rangeOfString:@"/"].location;
if (index != NSNotFound) {
// Storyboard: "$storyboardName/$controllerId"
NSString *storyboardName = [target substringToIndex:index];
targetBoard = [UIStoryboard storyboardWithName:storyboardName bundle:bundle];
targetId = [target substringFromIndex:index + 1];
} else {
// Controller: "$controllerName"
targetClazz = [bundle classNamed:target];
if (targetClazz == nil && !SMStringHasSuffix(target, @"Controller")) {
targetClazz = [bundle classNamed:[target stringByAppendingString:@"Controller"]];
}
}
}
UIViewController *controller = nil;
if (targetClazz != nil) {
//尝试获取xib资源
NSString *nibName = NSStringFromClass(targetClazz);
NSString *nibPath = [bundle pathForResource:nibName ofType:@"nib"];
if (nibPath != nil) {
// 通过xib资源文件创建控制器实例
controller = [[targetClazz alloc] initWithNibName:nibName bundle:bundle];
} else {
/// 通过反射类方式创建控制器实例
controller = [[targetClazz alloc] init];
}
...
// Initialize controller parameters
if (bundle.queryParams != nil) {
[controller setValuesForKeysWithDictionary:bundle.queryParams];
}
|
参数传递
使用 Query标准来传递参数,即在 uri 之后加上 ? 再带上键值对,多个键值对用& 来分开。
- 传值方式
detail?id=1000&title=test。
1
| [Small openUri:@"detail?from=app.home" fromController:controller];
|
- 接收解析为属性值
例如
DetailController)定义两个属性,属性名称和uri键值名保持一致,因为是通过setValuesForKeysWithDictionary来给相应属性赋值。
 1
 2
 3
 4
 5
 6
 7
 8
 9
10
11
| // DetailController.h
@property (nonatomic, strong) NSString *id;
// DetailController.m
NSString *id = self.id;
样例
// Initialize controller parameters
if (bundle.queryParams != nil) {
[controller setValuesForKeysWithDictionary:bundle.queryParams];
}
|
插件命名规则和入口设置
路由配置对插件包的命名有严格要求,SMBundle主要通过pkg名称包含.app.(模块库)/.lib.(工具库)来定位插件包的,否则全部默认加载bundle包。
模块命名规范
framework编译成功后,名称跟Product Name一样命名规则:
1
2
3
| xx_xx_lib_xx【com_example_small_lib_utils】
xx_xx_app_xx
xx_xx_xx_xx
|
注意lib、app这些对查找framework文件相当重要,这所以会有_,是small对.做了替换
 1
 2
 3
 4
 5
 6
 7
 8
 9
10
| NSString *bundlePath = nil;
NSString *bundleSuffix = @"bundle"; //默认
SMBundleType bundleType = SMBundleTypeAssets;
if ([pkg rangeOfString:@".app."].location != NSNotFound
|| [pkg rangeOfString:@".lib."].location != NSNotFound) {
bundleSuffix = @"framework";
bundleType = SMBundleTypeApplication;
}
NSString *bundleName = [pkg stringByReplacingOccurrencesOfString:@"." withString:@"_"];
bundleName = [bundleName stringByAppendingFormat:@".%@", bundleSuffix];
|
设置加载模块的入口类
- info.plist方式实现
在
framework模块工程的info.plist文件中添加Principal class字段:
1
2
| <key>NSPrincipalClass</key>
<string>ESHomeController</string> //指定入口类名
|
- bundle.json路由方式实现
通过设置bundle.json的
rules字典,指定初始化库的入口
1
2
3
4
5
| "rules": {
"": "默认入口类名"
"/Storyboard": "storyboardName/controllerId",
"/xib": "controllerName"
}
|
bundle.json中配置的入口,优先于info.plist中的Principal class的入口。
集成插件到主工程
- 插件集成
就是将
framework添加到主工程,不能以Linked方式进行添加,使用Build Phases中的Copy Bundle Resources 选项,将framework拖动添加其中即可,这样可以完成对framework编译完后的拷贝. - 插件启动原理
small框架会依次优先顺序检查
Documents/temp(下载的zip)–>/Documents/bundles(存放Framework)–>/iSmallApp.app/(app根目录),small规定插件Framework必须存放在这几个目录中,才能被small框架动态加载。
具体实现
 1
 2
 3
 4
 5
 6
 7
 8
 9
10
11
12
13
14
15
16
17
18
19
20
21
22
23
24
| NSString *bundleName = [pkg stringByReplacingOccurrencesOfString:@"." withString:@"_"];
bundleName = [bundleName stringByAppendingFormat:@".%@", bundleSuffix];
NSString *documentBundlesPath = [SMFileManager documentBundlesPath];
NSString *patchFilePath = [SMFileManager tempBundlePathForName:bundleName];
//沙盒中查找插件包,一旦发现,解压加载
if ([[NSFileManager defaultManager] fileExistsAtPath:patchFilePath]) {
// Unzip
NSString *unzipPath = documentBundlesPath;
ZipArchive *zipArchive = [[ZipArchive alloc] init];
[zipArchive UnzipOpenFile:patchFilePath];
[zipArchive UnzipFileTo:unzipPath overWrite:YES];
[zipArchive UnzipCloseFile];
[[NSFileManager defaultManager] removeItemAtPath:patchFilePath error:nil];
}
NSString *patchPath = [documentBundlesPath stringByAppendingPathComponent:bundleName];
///主工程目录下查找
NSString *builtinPath = [[SMFileManager mainBundlesPath] stringByAppendingPathComponent:bundleName];
NSArray *bundlePaths = @[patchPath, builtinPath];
for (NSString *aBundlePath in bundlePaths) {
if ([[NSFileManager defaultManager] fileExistsAtPath:aBundlePath]) {
bundlePath = aBundlePath;
break;
}
}
|
- 测试
完成添加,进入测试。使用过程中,有可以模块更新代码后,主工程调用发现功能未更新,这时候需要清理工程,重新编译;或者修改编译包配置,从而时时更新。
small的两种开发模式的demo
- 使用者模式
使用场景:作为第三方集成到自己的项目,包含两个特殊的文件
podfile和Small-subprojects.rb安装脚本文件。
podfile
1
2
3
4
5
6
| platform :ios, '7.0'
use_frameworks!
target 'Sample' do
pod "Small", :path => "../../"
end
|
Small-subprojects.rb安装脚本文件
通过脚本来设置build settings中的FRAMEWORK_SEARCH_PATHS配置:
1
2
| config.build_settings['FRAMEWORK_SEARCH_PATHS'] << "$(CONFIGURATION_BUILD_DIR)/**"
puts "Small: Add framework search paths for '#{dep.name}'"
|
- 开发者模式
使用场景:需要对Small框架集成自己的功能需求时,可以使用该Demo快速部署对Small框架的开发环境
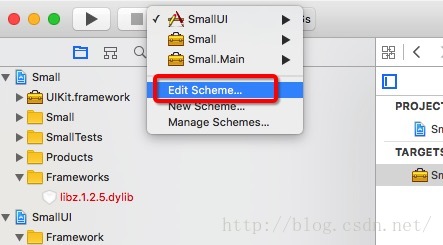
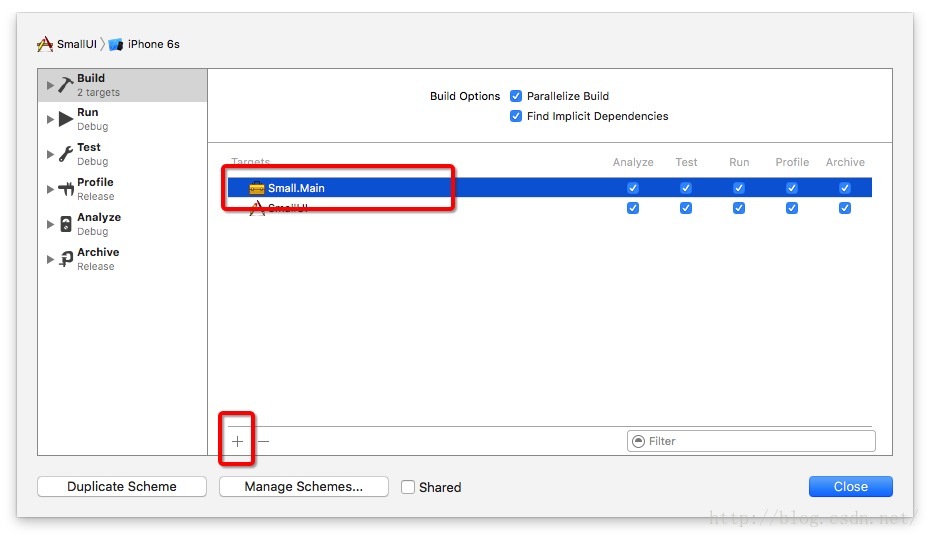
需要去除并行编译模式:Edit Scheme...->Build->Build Options-> [ ] Parallelize Build
各个组件需要签名后才支持代码级别更新。示例中更新例子为xib内容更新。
使用Small创建iOS工程目录
Small UI route文档
